Dot Pattern Editor
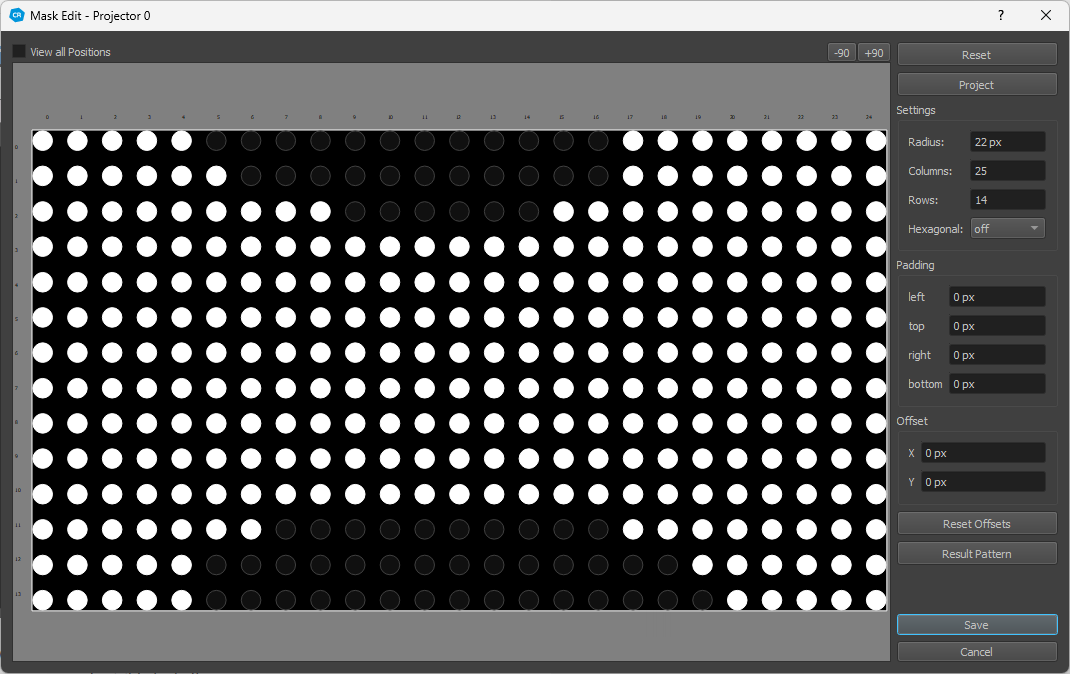
The Dot Pattern editor allows to reduce the projected points for a projector. This is often needed if points are projected beyond screen or only visible by half.
The more dots are displayed the better is the result of calibration. But all points in the mask must be visible by the selected camera.
To remove dots drag over the points by pressed left mouse button, for adding points drag with pressed right mouse button or hold alt-key. After modifying the dot mask press Save to save the mask.
In order to get more close to the screen edge, or if projectors have some parts at the edge where they can not produce a clean image, a padding setting can be used to fine adjust the dot pattern placement.
For more complicated discontinuous surfaces like cars and buildings, it is possible to offset individual points as well.
The adjustments made in this dialog are shown live on the physical projector, giving immediate feedback of the result.
- Remove Points:
To remove dots, click o the points or drag over the points with left mouse button.
- Add Points:
For adding points drag with pressed right mouse button or hold alt-key.
- Offset Points:
Select points, then drag with the mouse, or adjust offset numerically.
- Reset:
Reset the dot pattern mask by enabling all dots again. Or if a dot pattern for a distinct camera position is edited, the mask will be reset to the global projector mask.
- Project:
Show/update the current dot pattern on projector.
- Global Settings:
If a global dot pattern mask is edited the following settings are also available.
- Radius:
radius of dots in pixels. Might need to be changed depending on how big the points are seen by camera.
- Columns/Rows:
number of dot columns/rows
- Hexagonal:
Arrange dots in a hexagonal, more dense packed pattern. This often leads to better data at the edges of the screen.
The hexagonal pattern can be oriented horizontal or vertical.
- Padding:
Inset of points on left/right/top/bottom edge of projector
- Offset:
Offset of currently selected dots.
- Reset Offsets:
Reset all point offsets to (0,0).
- Result Pattern:
Adjust the dot pattern to the currently detected dots. When the Dot Pattern Editor is opened on a projector on a distinct position, the dots detected on this position are used. When the global Dot Pattern Editor is used, all captures from all camera positions for the current projector are considered.
- View all Positions:
Visualizes additional information as dot border color. The following screenshot has the projector masked completely on current position for better visibility of dot borders.
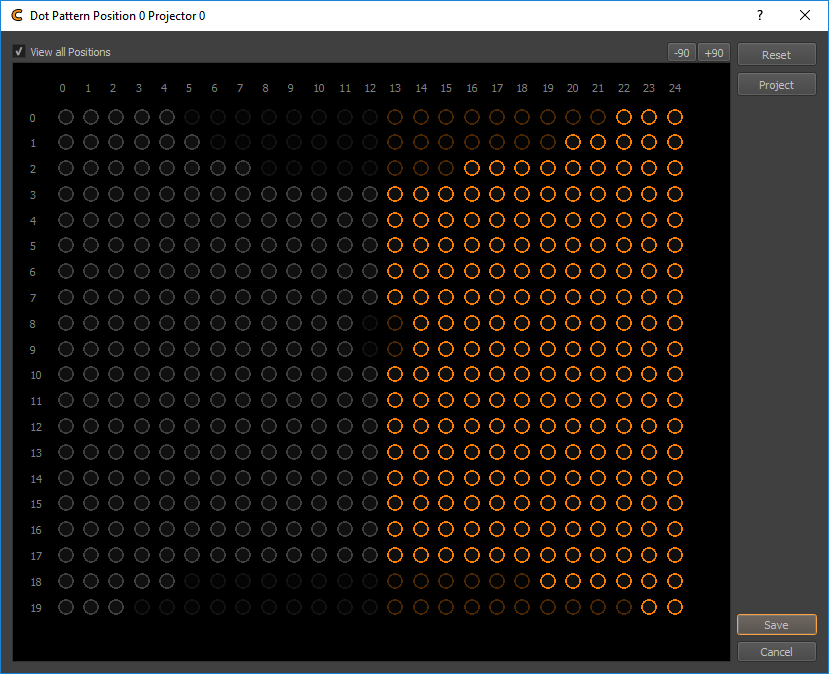
- Dark:
masked globally
- Bright:
not masked globally
- Orange:
used on other positions
- Gray:
not used on other positions.
- Rotate +-90:
Visually rotates the dot pattern in the editor, for more convenient editing of dot patterns for projectors in portrait mode, or other strange orientations.