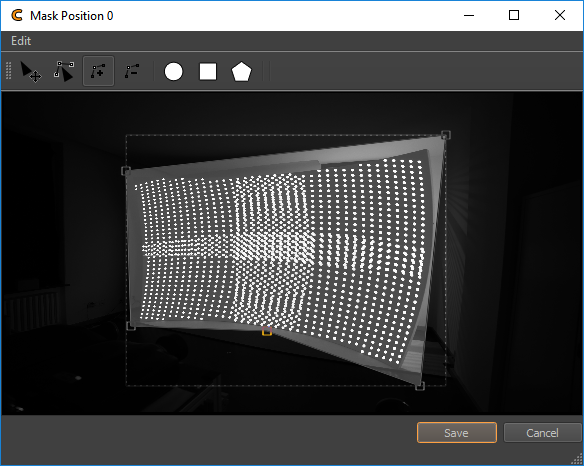
Mask Editor
Sometimes reflections, blinking lights or monitors that are not part af the actual projection are falsely detected as part of the projection and thus negatively influence the calibration result. Masking areas in the camera image containing such disturbances avoids their false detection.
The Mask Editor allow to create vector based masks for captured camera images. It shows a camera image and allows to paint on top to mask regions.

The masking is defined through the color of the background and the color of the shapes. Black areas are masked out. By default the background is white and created shapes are black, so that the created shapes cut out parts from the projection.
The fastest way to mask the outer parts of a camera image, is to outline the area that should be kept, using a white polygonal shape on a black background.
Activate .
Set the corners of the polygon by clicking on the image. You now have a black polygon on a white background, which would mask out its contents.
Use (Ctrl-I) to have a white polygon on black background. Now the outer part will be removed from recognition.
Accept the changes by pressing the Save button.
- Add Shapes:
Using the toolbar, new shapes can be placed. Click the circle, rectangle, or polygon to place the corresponding form on the drawing canvas.
- Add Circle
 (C):
(C): Click on the image to create new circles.
- Add Rectangle
 (R):
(R): Click on the image to create new rectangles.
- Add Polygon
 (P):
(P): Set the corners of the polygon by clicking on the image.
- Add Circle
- Delete Selected Items (Del):
Selected Shapes can be deleted by pressing the ”del”-key or through the menu item .
- Clear Scene (Ctrl-N):
The complete scene can be cleared to white through the menu item .
Edit Items (V)  :
:
- Left-Mouse-Button:
Select and move shapes on the canvas
- Middle-Mouse-Button:
Stretch circles and rectangles
- Right-Mouse-Button:
Proportional scale of circles and rectangles
- Edit Polygons:
When a polygonal shape is selected, additional editing options are available:
- Edit Points
 (A):
(A): Select and drag polygon vertices to adjust their position. (Arrow-Keys) can be used as well for moving. (,) and (.) select previous or next adjacent vertex.
- Add Points
 (+):
(+): Click on any polygon edge to add a vertex. While mouse is still pressed, position of currently added vertex can be corrected.
- Remove Points
 (-):
(-): Click on vertices to remove them.
- Edit Points
- Invert Scene (Ctrl-I):
The complete masking can be inverted using
- Set Item Color…:
The color of currently selected shapes can be changed using .
- Set Item Background Color…:
The background color can be changed using .