Calibration Troubleshooting
Getting rid of falsely recognized dots
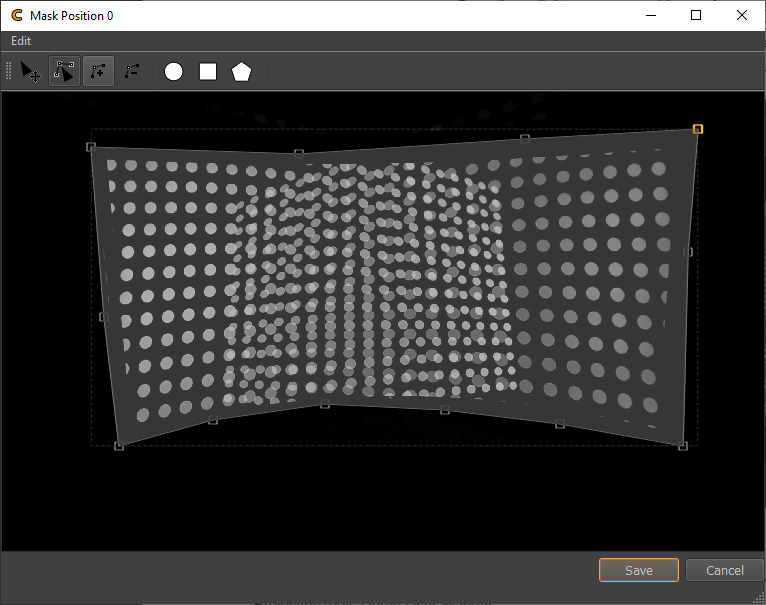
Mask camera image
It is not always possible to eliminate all sources that interfere with
the picture taking process. Sometimes light sources or shiny surfaces
cause the system to detect dots where there actually are none. In that
case an additional mask can be applied to the camera image using Positions/Position/Edit Mask....

Mask Edit
The mask can be used to hide objects (dark mask drawn on top of light sources) or to actively mark the area to be used (bright mask drawn over the points to be recognized).
The whole scene can be inverted using the shortcut CTRL-I or the menu
entry: Edit/Invert Scene.
The color of single selected objects can be changed through the
menu entry: Edit/Set Item Color.... It is highly advised to use only the colors black
(disregard objects) or white (use objects) - even if its possible to use
the full color spectrum.
The next step is to analyze the images again. Use Capture Toolbar/Analyze Images.
By default the dots will be projected onto the screen again, but no pictures will be taken.
When looking on the results again, the false hits should have been removed.
Mask dot pattern
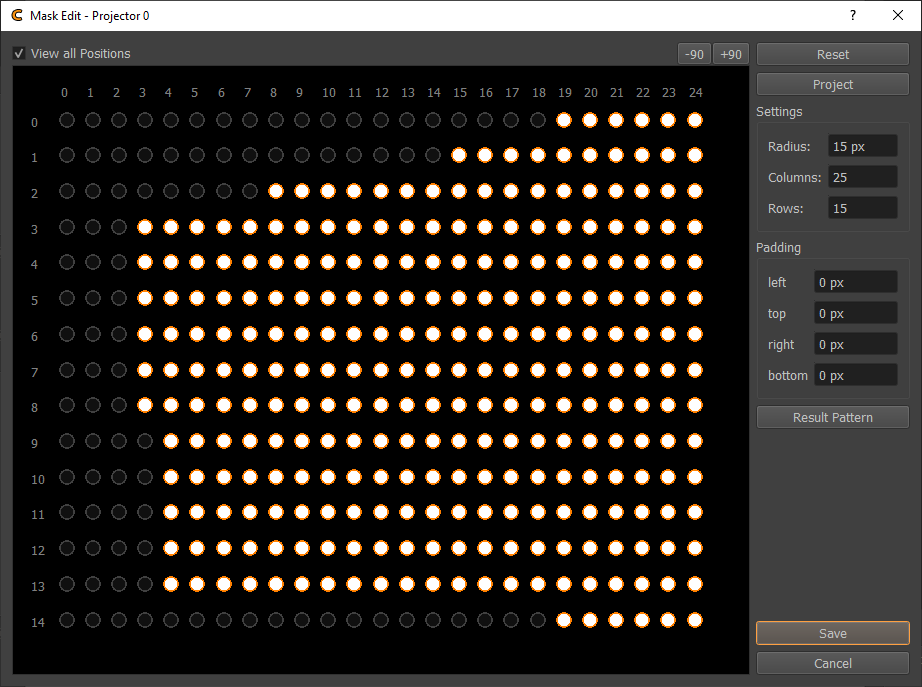
In order to let Creator know how many points actually should be detected, the dot pattern can be adjusted, and dots that are beyond screen, cut off, or projecting on obstacles can be removed. So they are not projected at all, not detected and not counted when the calibration quality is calculated and shown as color and tooltip of cells in position table.
By double-clicking on a projector in the projector list a dialog is opened that allows to edit this dot pattern for the corresponding projector.

Dot Pattern Editor
In the biggest part of this new window a dot pattern is visible. This pattern will be shown during the calculation process.
By using the mouse, dots can be deleted (click and drag) form the pattern or recreated (alt+click and drag). Using the “projecting” button the actual pattern will be projected onto the screen.
If the dots appear to be too small, or not plentiful enough the size as well as the number can be altered.
When satisfied with the result save the dot map by clicking “save” and close the dialog to continue the same process with the other projectors.
Fix too bright or too dark blending
When the blend zones are too bright or too dark, probably the gamma curve of the projector is not matching the assumed gamma curve in Mapper2d.
Check and adjust the gamma setting of your projector to be on gamma 2.2.
If not possible, adjust Settings/Shading/Gamma in Mapper2d. Use preview image again to update
the projection with the new gamma values applied.
- Blending too dark
Gamma in Mapper2d is lower than actual projector gamma.
- Blending too bright
Gamma in Mapper2d is higher than actual projector gamma.