Export Pandoras Box
Pandoras Box Exporter supports export of warping and blending as well
as setting up the virtual cameras. Mapper2d and Mapper3d comes with a
version of PB Automation which is used to update the camera
settings directly. Please check
http://coolux.de/root/downloads/support/SDK/PandorasBoxSDK.zip for
the latest version of PB Automation.
Requirements
Pandoras Box Exporter has the following requirements:
Mapper Version |
Pandoras Box Product |
Minimum PB Version |
|---|---|---|
Mapper2d |
PlayerCompact PlayerSoftware Player |
V6.0 Rev15432 |
Mapper3d |
Server |
V6.0 Rev15432 |
For legacy pre split content support see section [presplit] <#presplit.
The exporter creates the following files:
- A set of
warping_*.Xfiles containing the warping that should be placed in the mesh slot of the corresponding outputs.
- A set of
- A set of
shading_*.pngfiles containing blending information. These files must be placed in the output blend slot. Ensure that the Warped checkbox is ticked.
- A set of
- A set of
frustum_*.csvfiles containing the camera position and orientation as well as the FOV, offset and roll information. These files are needed only if
automationis disabled.
- A set of
- A set of
layer_*.Xfiles which define layer geometry to fill the default camera exactly. These files are used for legacy pre split content support only. see section [presplit] <#presplit for detailed information.
- A set of
Export Settings
2D Settings
3D Settings
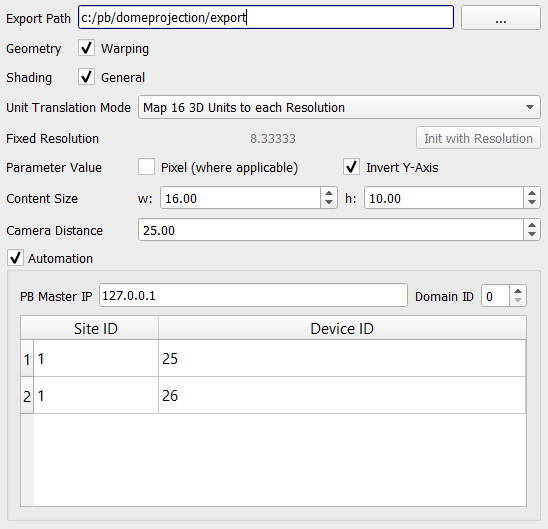
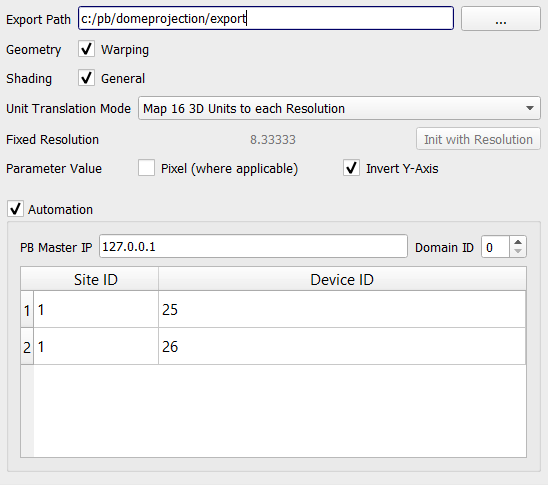
- Export Path:
A folder where the exported files should be saved. This folder should exist.
- Geometry:
Enable to export
warping_*.Xandlayer_*.Xfiles defining the warping and layer mesh.- Shading:
Enable to export (
shading_*.png) masks containing monochrome blending, clipping and shading information.- Unit Translation Mode:
Select the unit translation mode configured in Pandoras Box. You will find this configuration under in Pandoras Box.
- Init with Resolution:
This option is available only when
Unit Translation Modeis set toUse Fixed Relationship. Choose the resolution configured in Pandoras Box. SeeCompositing Passin Pandoras Box under .- Parameter Value:
Adapt the settings appropriate to the Pandoras Box configuration under
Parameter Value Readoutwhich can be found under .- Content Size (Mapper2d only)
Enter the content width and height either in pixels (when
Parameter Value Pixel(where applicable)is ticked) or in generic units.- Camera Distance (Mapper2d only)
Enter the camera distance to the content either in pixels (when
Parameter Value Pixel(where applicable)is ticked) or in generic units.- Automation:
If enabled, the Pandoras Box exporter tries to update the cameras by use of PB Automation. Note that Pandoras Box Exporter internally uses Pandoras Box generic units. For this it is necessary that the interpretation of Automation Param Input values is set to generic units. See section
Parameter Value Readoutunder for details.- PB Master IP:
Enter here the IP address of the Pandoras Box master instance. Only necessary when
Automationis enabled.- Domain ID:
Enter the Pandoras Box master Domain ID. You will find the Domain ID in Pandoras Box under . Only necessary when
Automationis enabled.
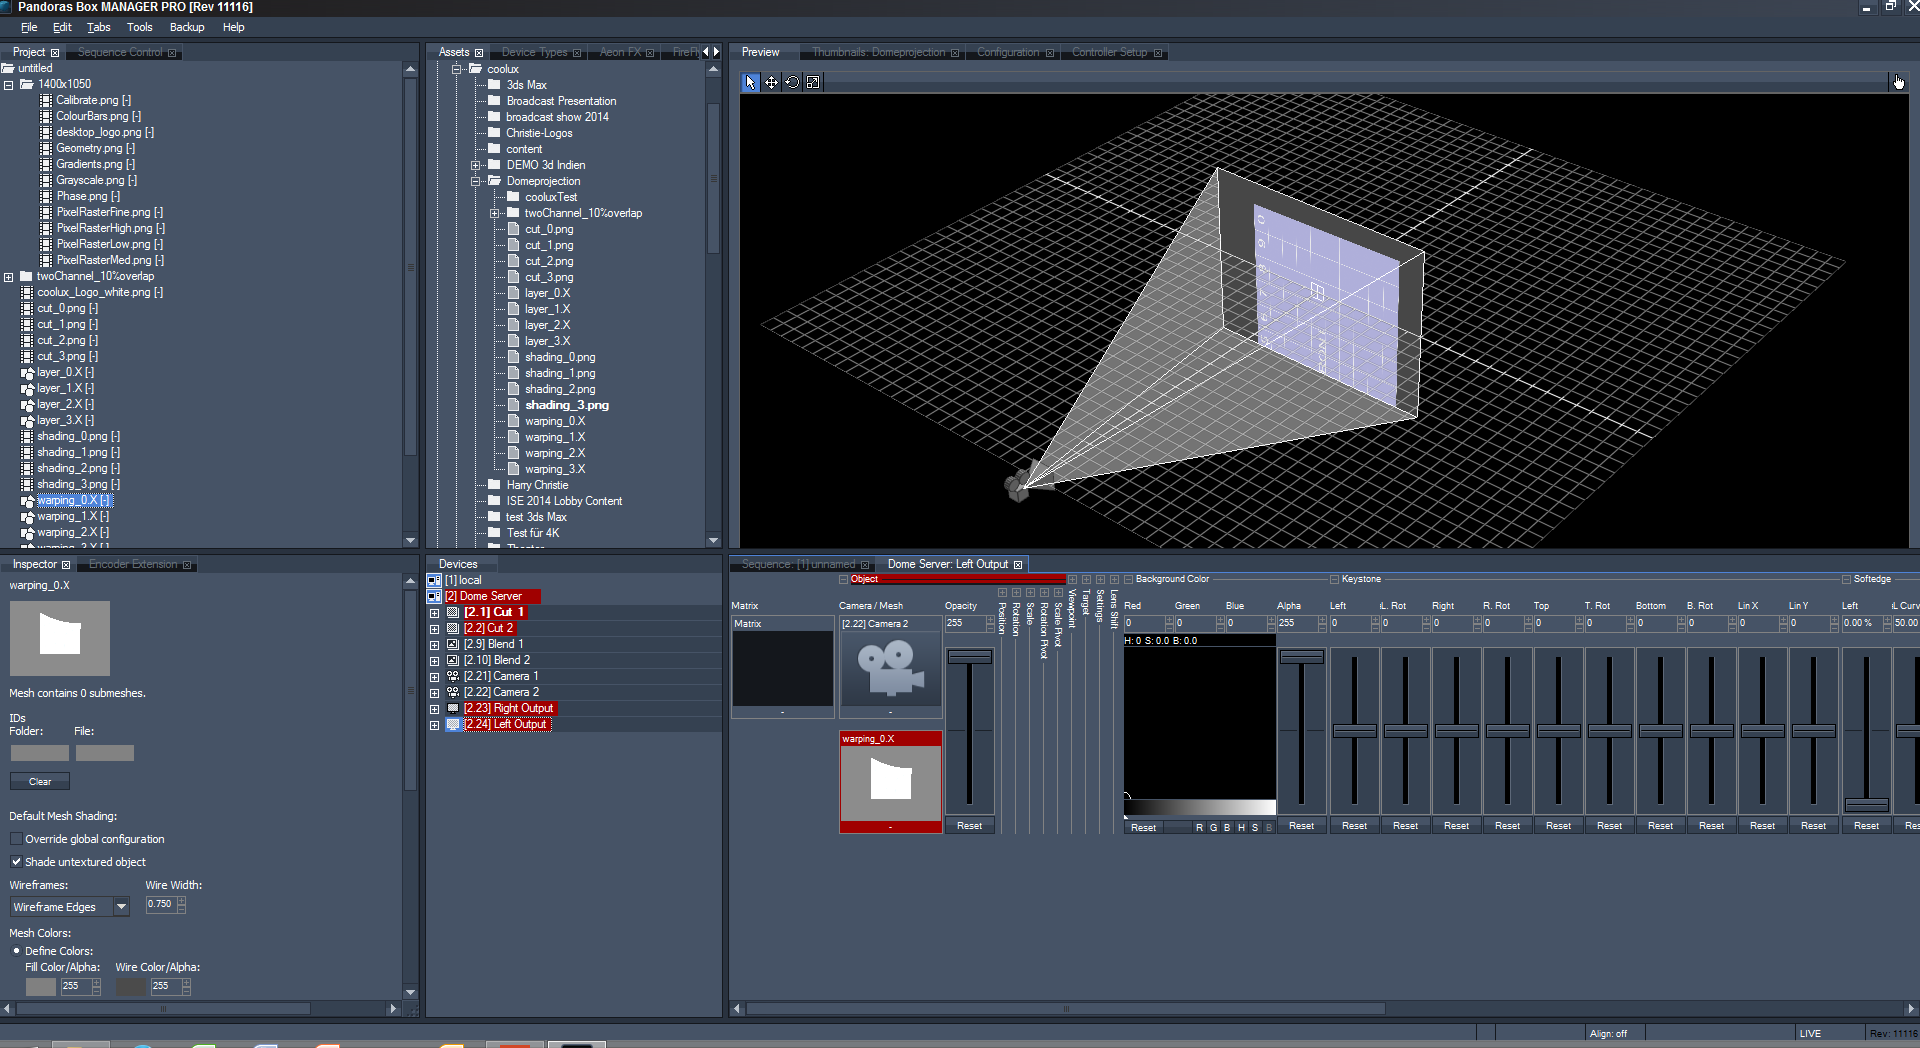
Mapper2d and Mapper3d creates for each projector an entry in the
automation table. If Automation is enabled, it is necessary to
configure the Site ID and Device ID values. Row 1 is for
Projector one, row 2 for projector two and so on. Enter here the
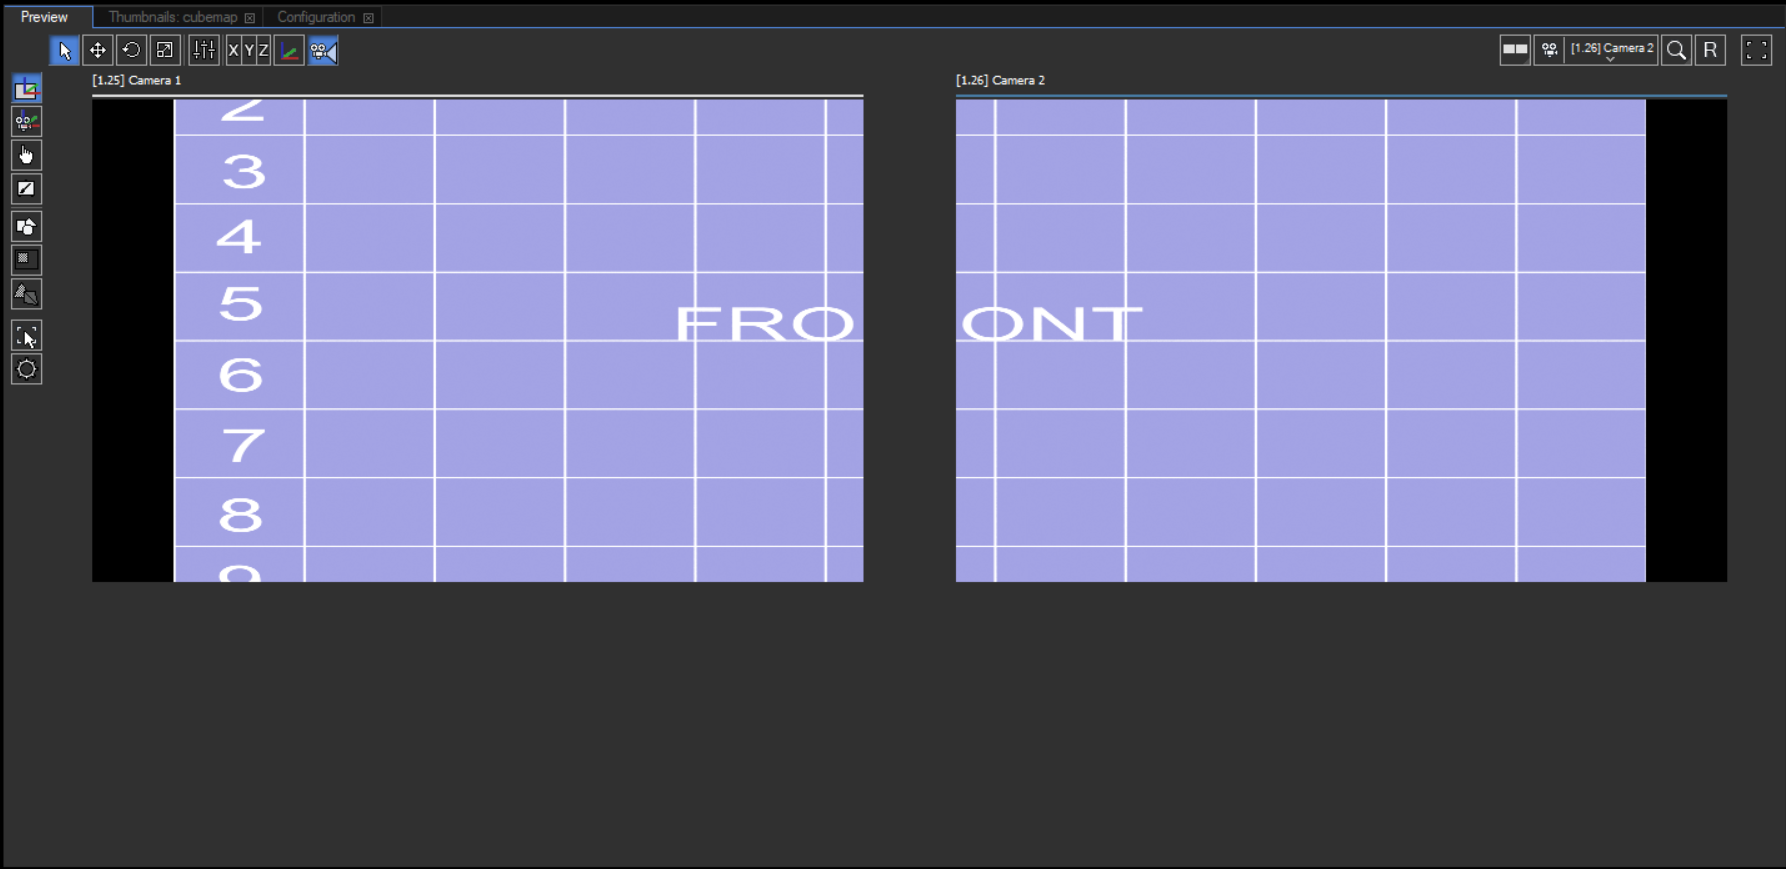
appropriate camera device and site IDs. You will find these values in
the Device Tree in Pandoras Box (e.g. [1.25] Camera ([Site
ID.Device ID])). If Automation is disabled you have to copy the
values from the generated frustum_*.csv files to the appropriate
camera devices.
Example of a two channel system (one device two outputs) with Mapper2d
The following section describes a very simple example setup and the workflow to create a proper result in Pandoras Box. The starting situation is shown in table 1 <#starting_situation_mapper2d_pandoras_box_example
content size |
3600x1800px |
|---|---|
display resolution |
2560x1600px |
generic unit to px |
2560/16 = 160 |
content size in generic units |
3600/(2560/16)x1800/(2560/16)px = 22.5x11.25 |
Table 2 <#configuration_mapper2d_pandoras_box_example shows some different configuration options. In option 2 for example the mapping has to be configured as 2:1, the cutting rectangles can be rotated and the uv scale has to be set to 1x0.5. In the exporter the content size have to be set to 22.5x22.5 generic units (see table 1 <#starting_situation_mapper2d_pandoras_box_example for the conversion between pixels and generic units) and the camera distance can be set to the default value. In this case no scaling in Pandoras Box is necessary.
2-7 |
M apper2d |
Pand orasBox |
||||
|---|---|---|---|---|---|---|
2-7 |
mapping config uration |
e xporter config uration |
Layer |
|||
2-7 |
Mapping |
Cutting |
UV scale |
Content Size |
Cam d istance |
Imag eScaleY |
1 |
1:1 |
rotated |
1 x 1 |
22.5 x 22.5 |
25 |
1 |
2 |
2:1 |
rotated |
1 x 0.5 |
22.5 x 22.5 |
25 |
1 |
3 |
2:1 |
un rotated |
1 x 1 |
22.5 x 11.25 |
25 |
1 |
4 |
2:1 |
rotated |
1 x 1 |
22.5 x 22.5 |
25 |
2 |
Table 3 <#workflow_mapper2d_pandoras_box_example shows to steps to apply the expor data to Pandoras Box.
Step |
Pandoras Box |
|---|---|
(only when Automation was disabled during export)
Open |
|
Import exported data to the Pandoras Box project by dragging the export folder from Assets-tab to Project-tab. |
|
Drag |
|
Drag |
|
Presplit Content Setup
The cutting rectangles in Mapper2d must match the cutting used in the corresponding Pandoras Box project. (There should be only one projector per device.)
A matching cutting layout can be achieved in multiple ways:
editing the cutting rectangles in Mapper2d by hand
use
- use ProjectionTools Cutter to create presplit content based on
cutting rectangles from Mapper2d (strongly recommeded for dome content)
Setup Pandoras Box for presplit content
The cutting rectangles in Mapper2d must match the cutting used in the corresponding Pandoras Box project. (There should be only one projector per device.)
A matching cutting layout can be achieved in multiple ways:
editing the cutting rectangles in Mapper2d by hand
use Extras!Layout Cutting Rectangles…
- use ProjectionTools Cutter to create pres plit content based on
cutting rectangles from Mapper2d (strongly recommended for dome content)
In order to setup Pandoras Box for pre split content, a sample pre split content should be available to make setup easier to verify. A fast way to create a pre split still image is to use A file dialog opens and requests an image and an output path. The source image is than sliced and the subimages are stored in the output folder. Import the sliced image into your Pandoras Box project.
For pre split projects all the cameras will stay at their default positions in Pandoras Box. All cameras are placed and oriented the same way with no shift.
The exported data must be imported into the Pandoras Box project and applied to the corresponding layers and cameras.
- Import data to the Pandoras Box project by dragging the export
folder from Assets-tab to Project-tab.
- (optional) Drag
layer_*.Xto mesh slots of all layers in the corresponding device, that should contain presplit content or the shading images. Images placed on these layers should now perfectly match the cameras view (in Pandoras Box 5 this is optional since the layers match the default camera by default).
- (optional) Drag
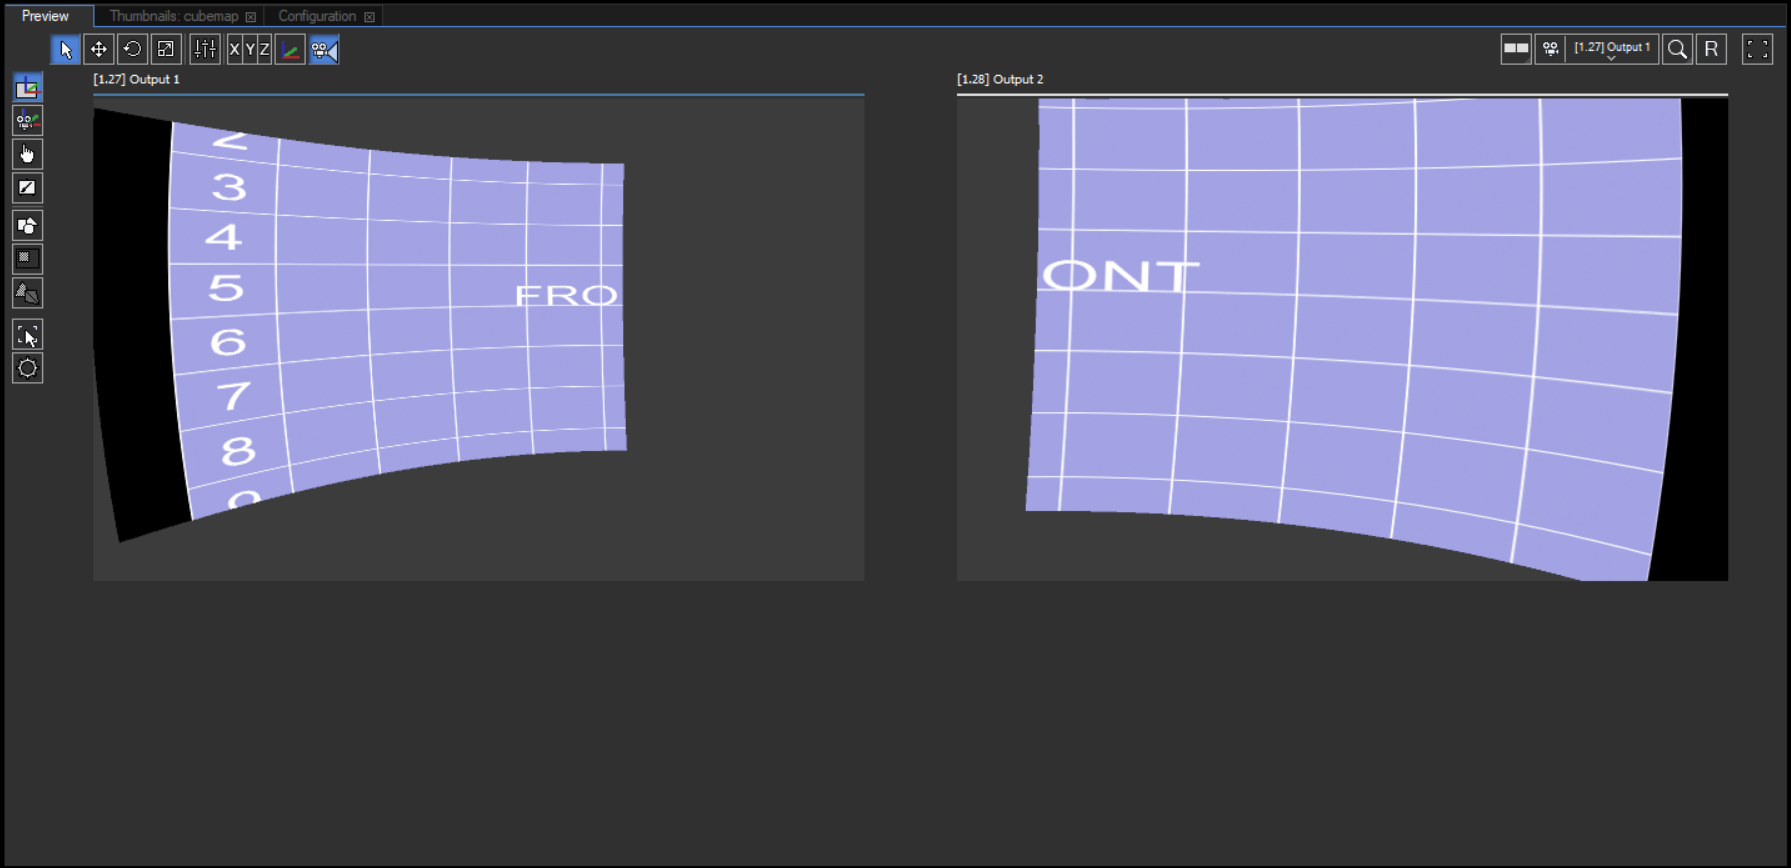
- Drag
warping_*.Xto mesh slot of corresponding output. The resulting image should now appears warped in preview window.
- Drag
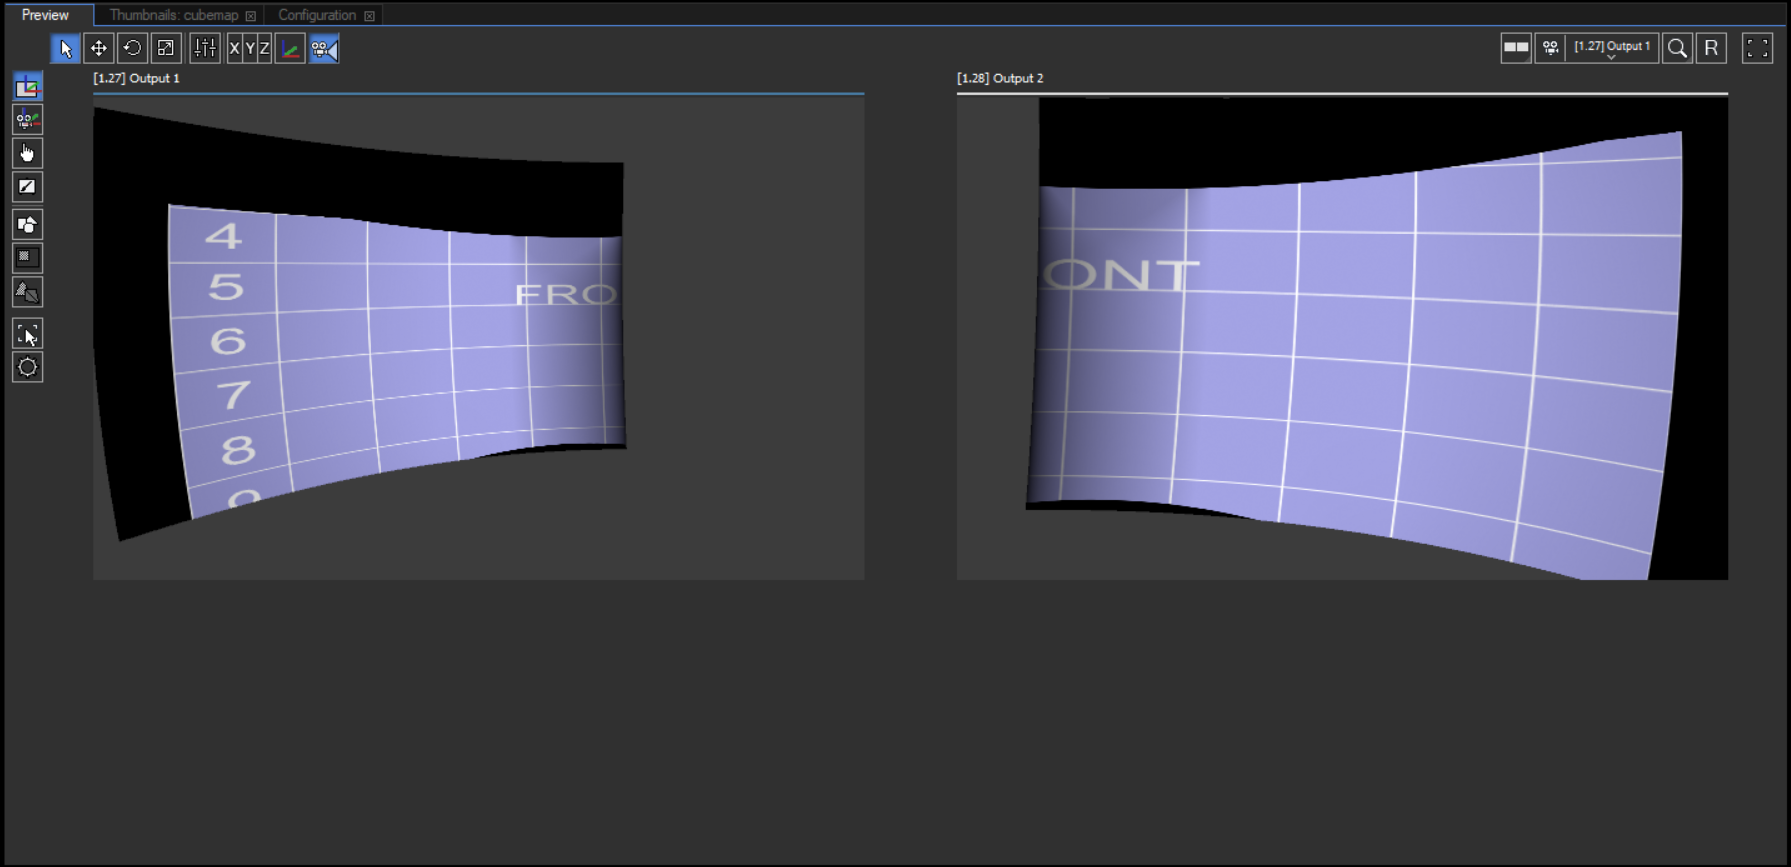
- Drag
shading_*.pngto top most layer in corresponding devices and set opacity to 255. One ore more edge should get dark, depending on the overlap with other projector
- Drag
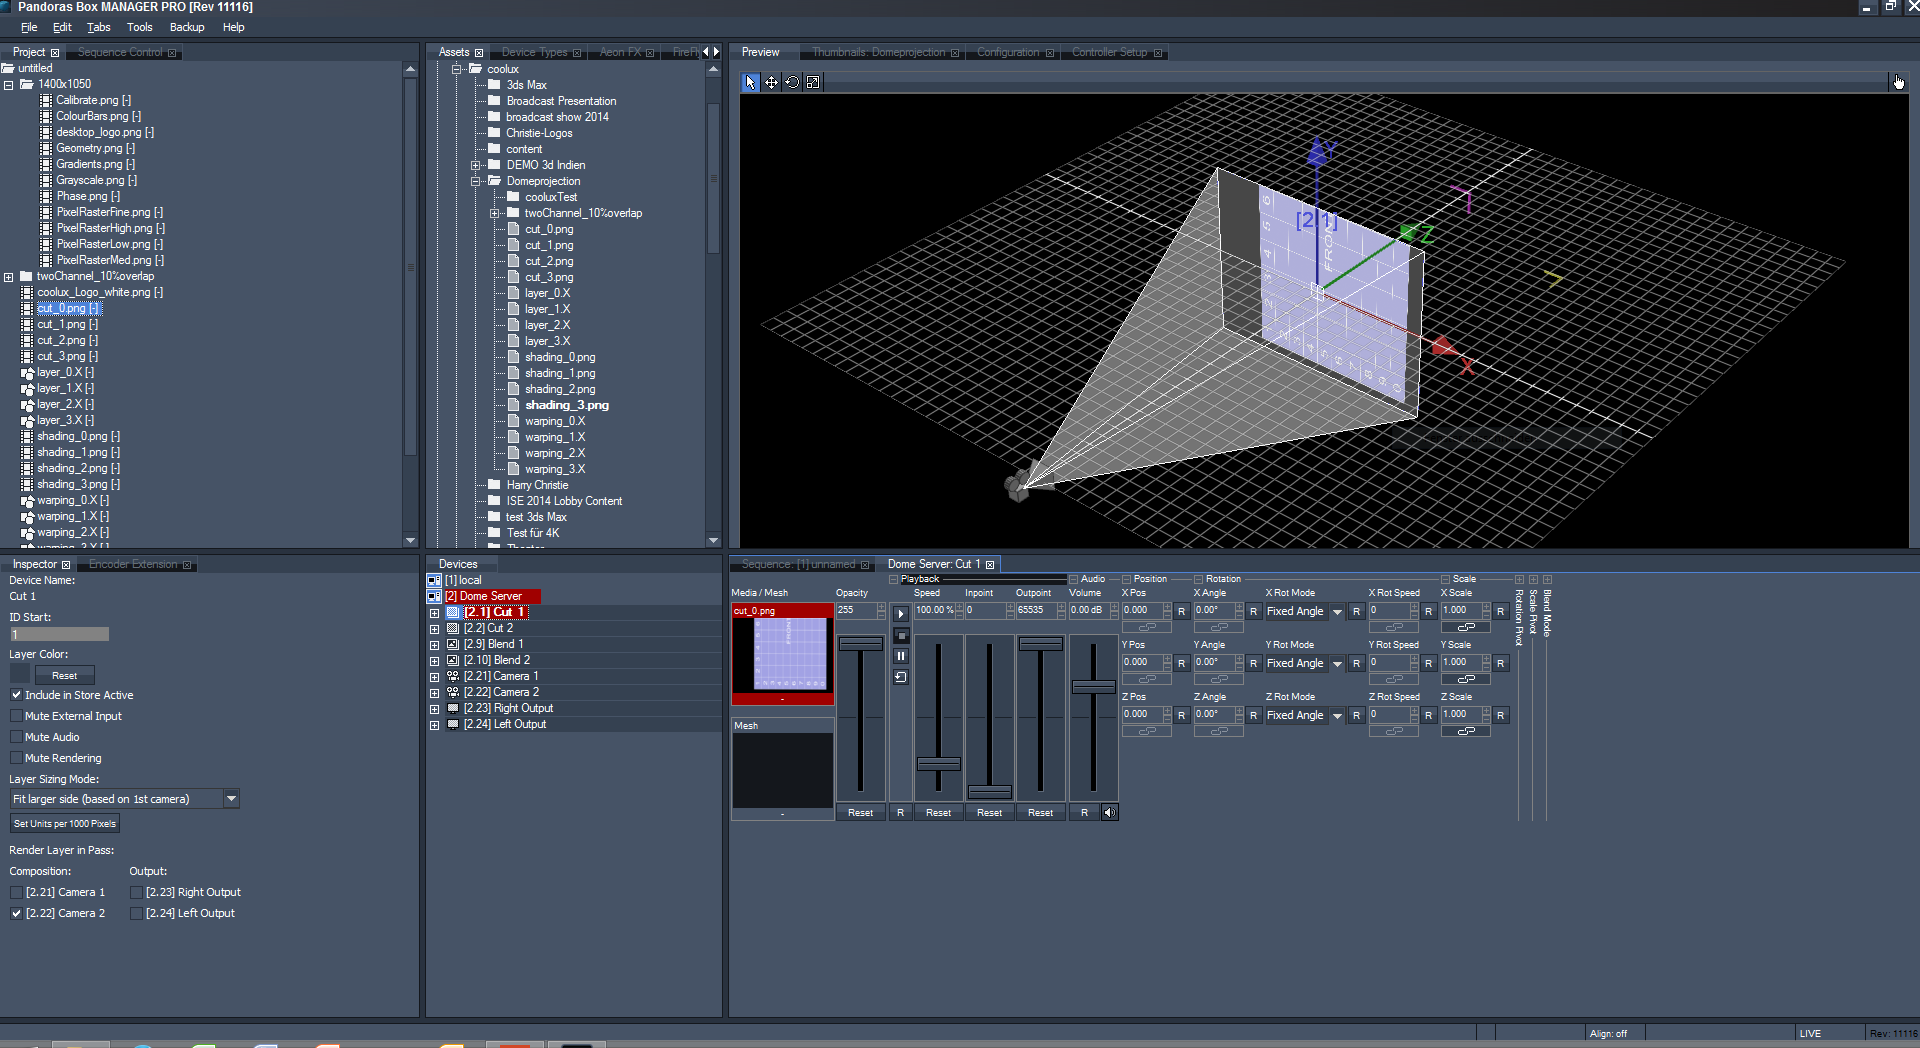
Example of a two channel system (one device two outputs).
Step |
Pandoras Box |
Screen |
|---|---|---|
Original output from two projector project using standard test pattern |
|
|
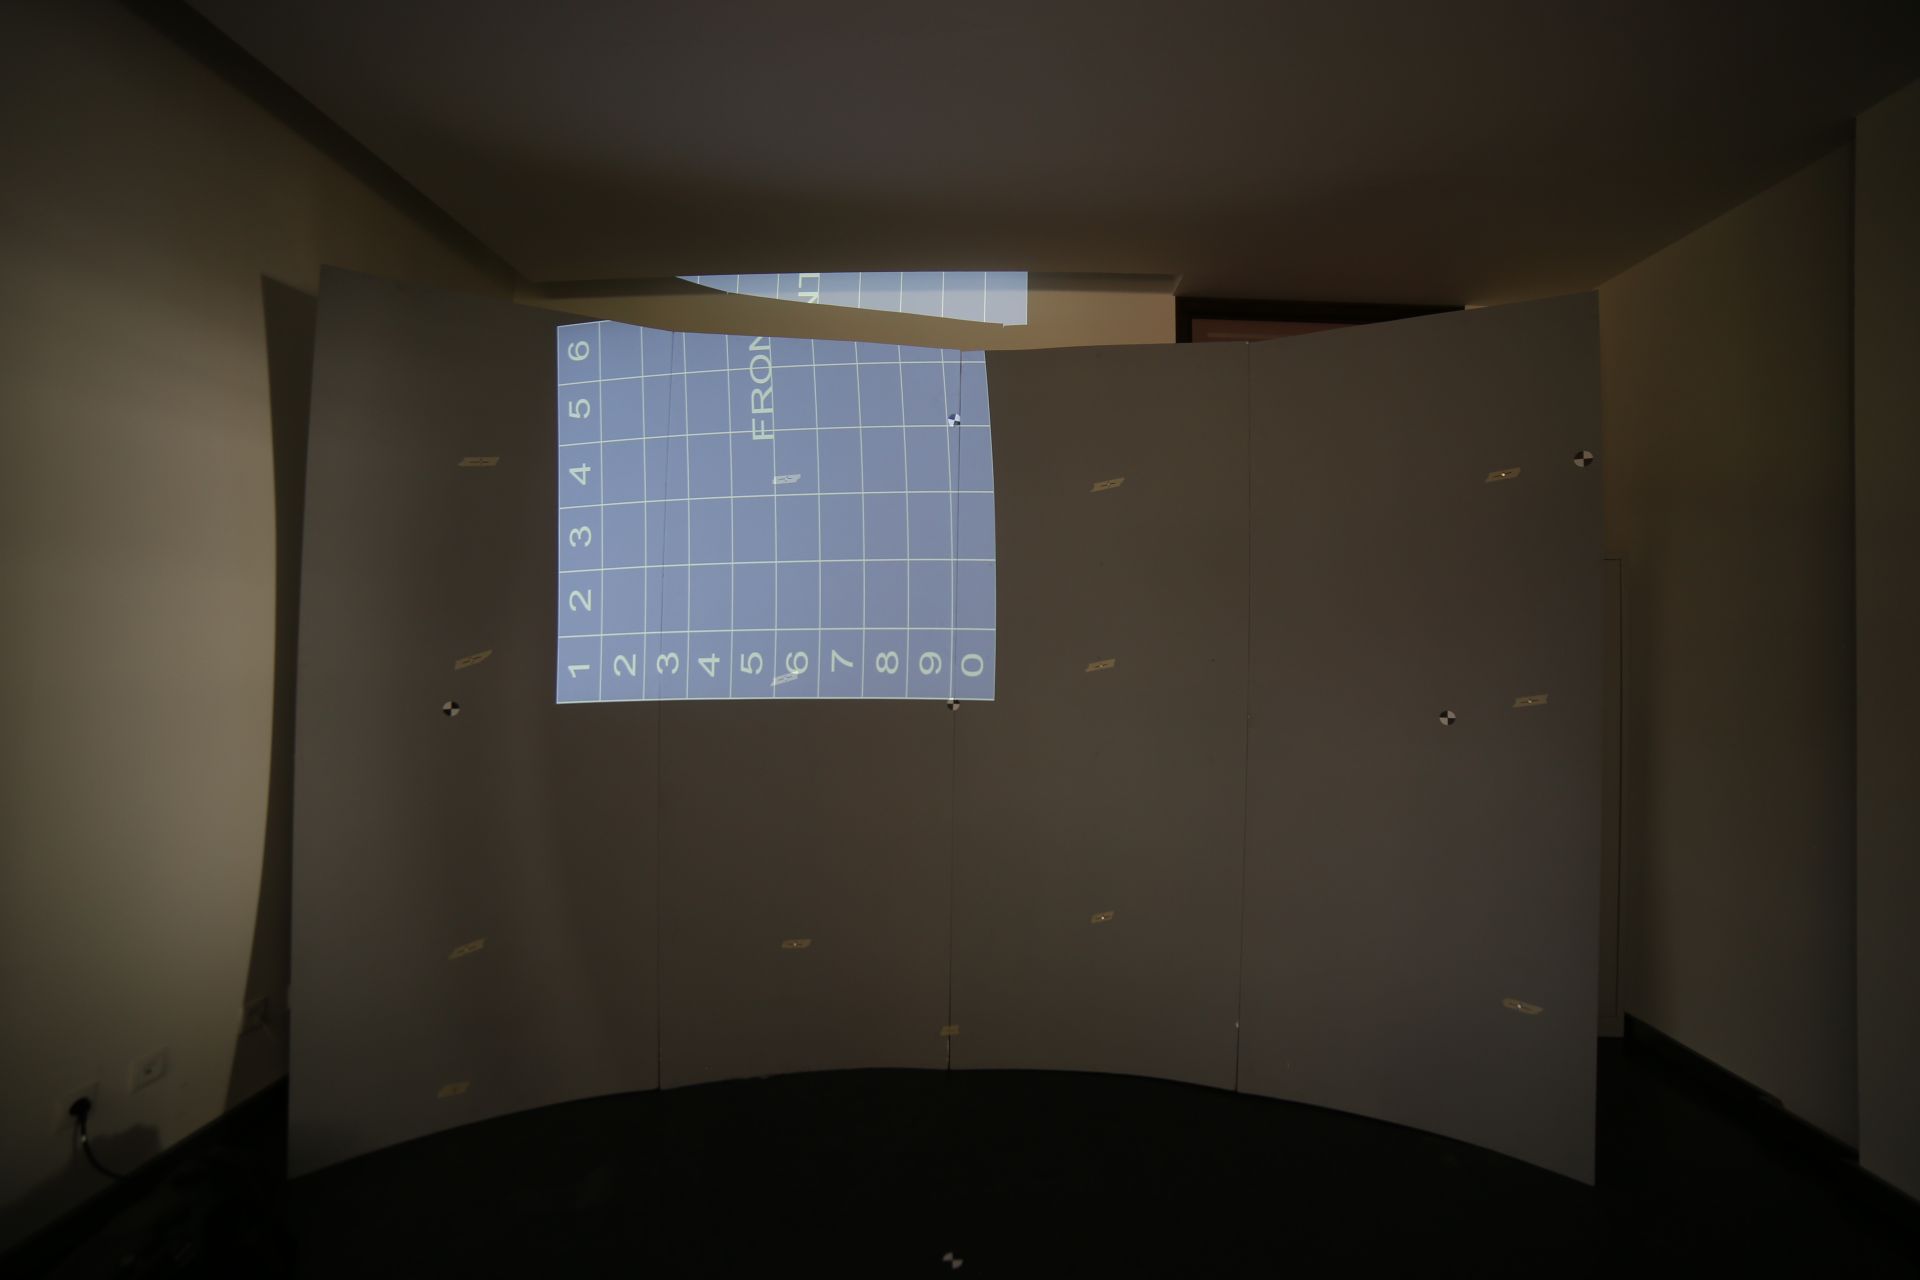
Presplit content loaded |
|
|
Presplit content assigned to correct camera |
|
|
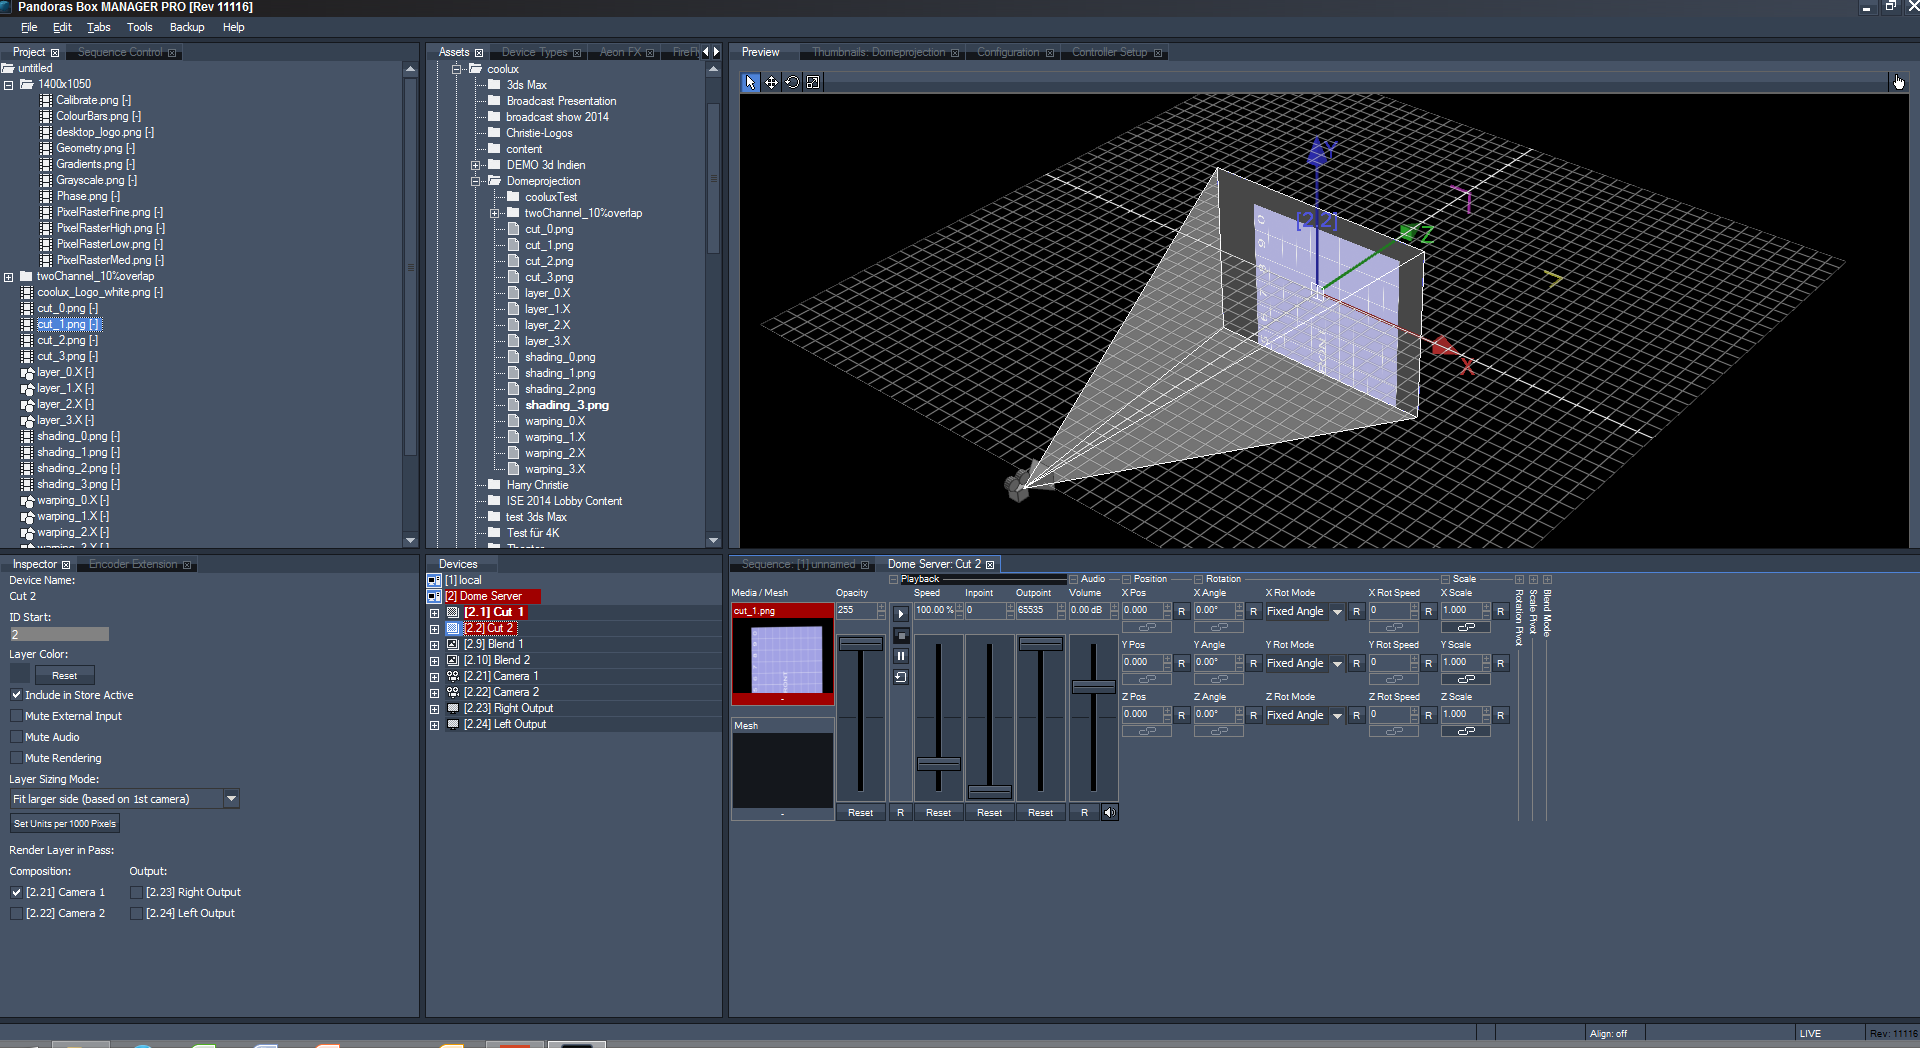
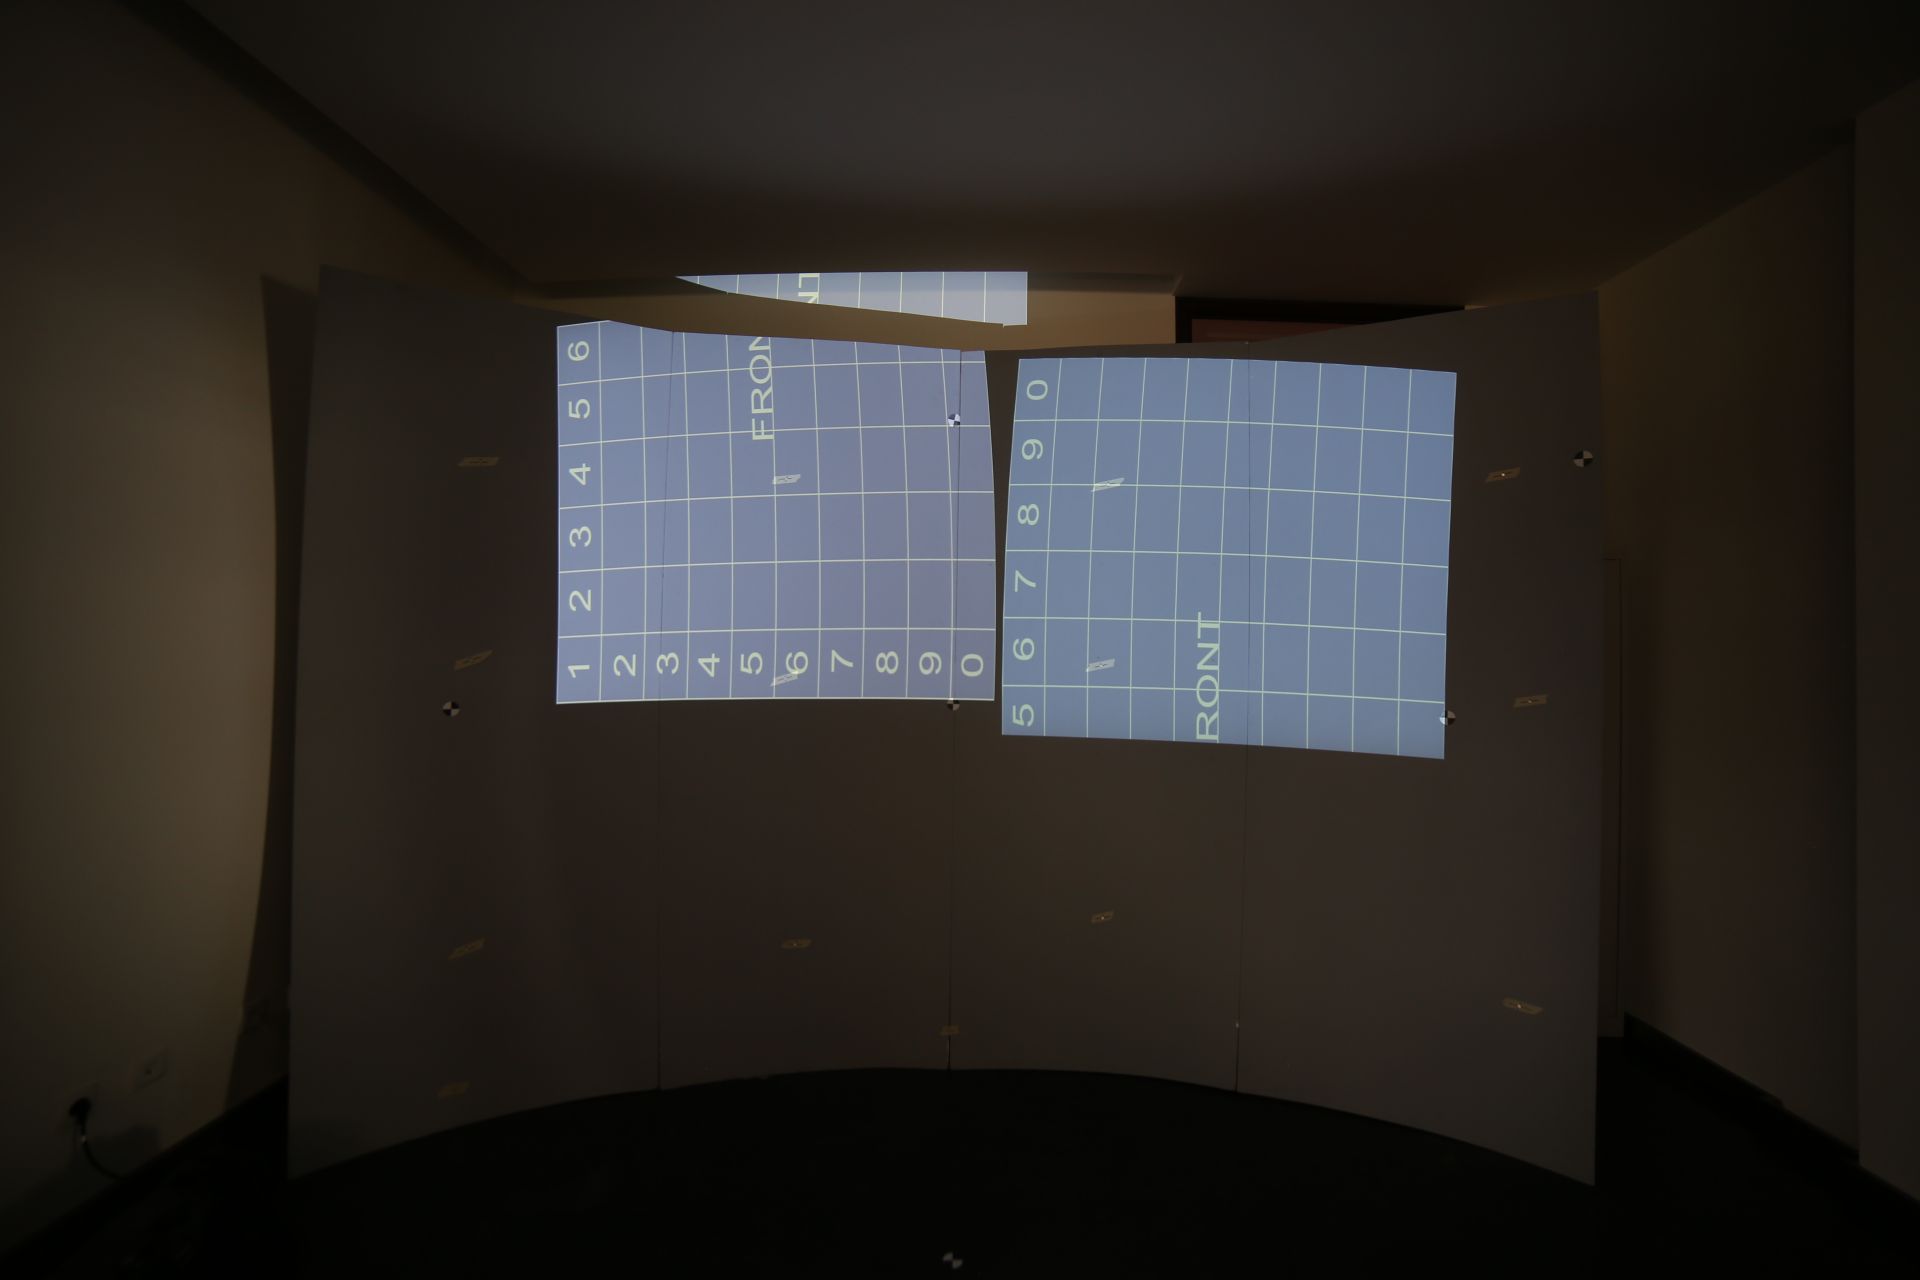
All presplit content loaded and assigned |
|
|
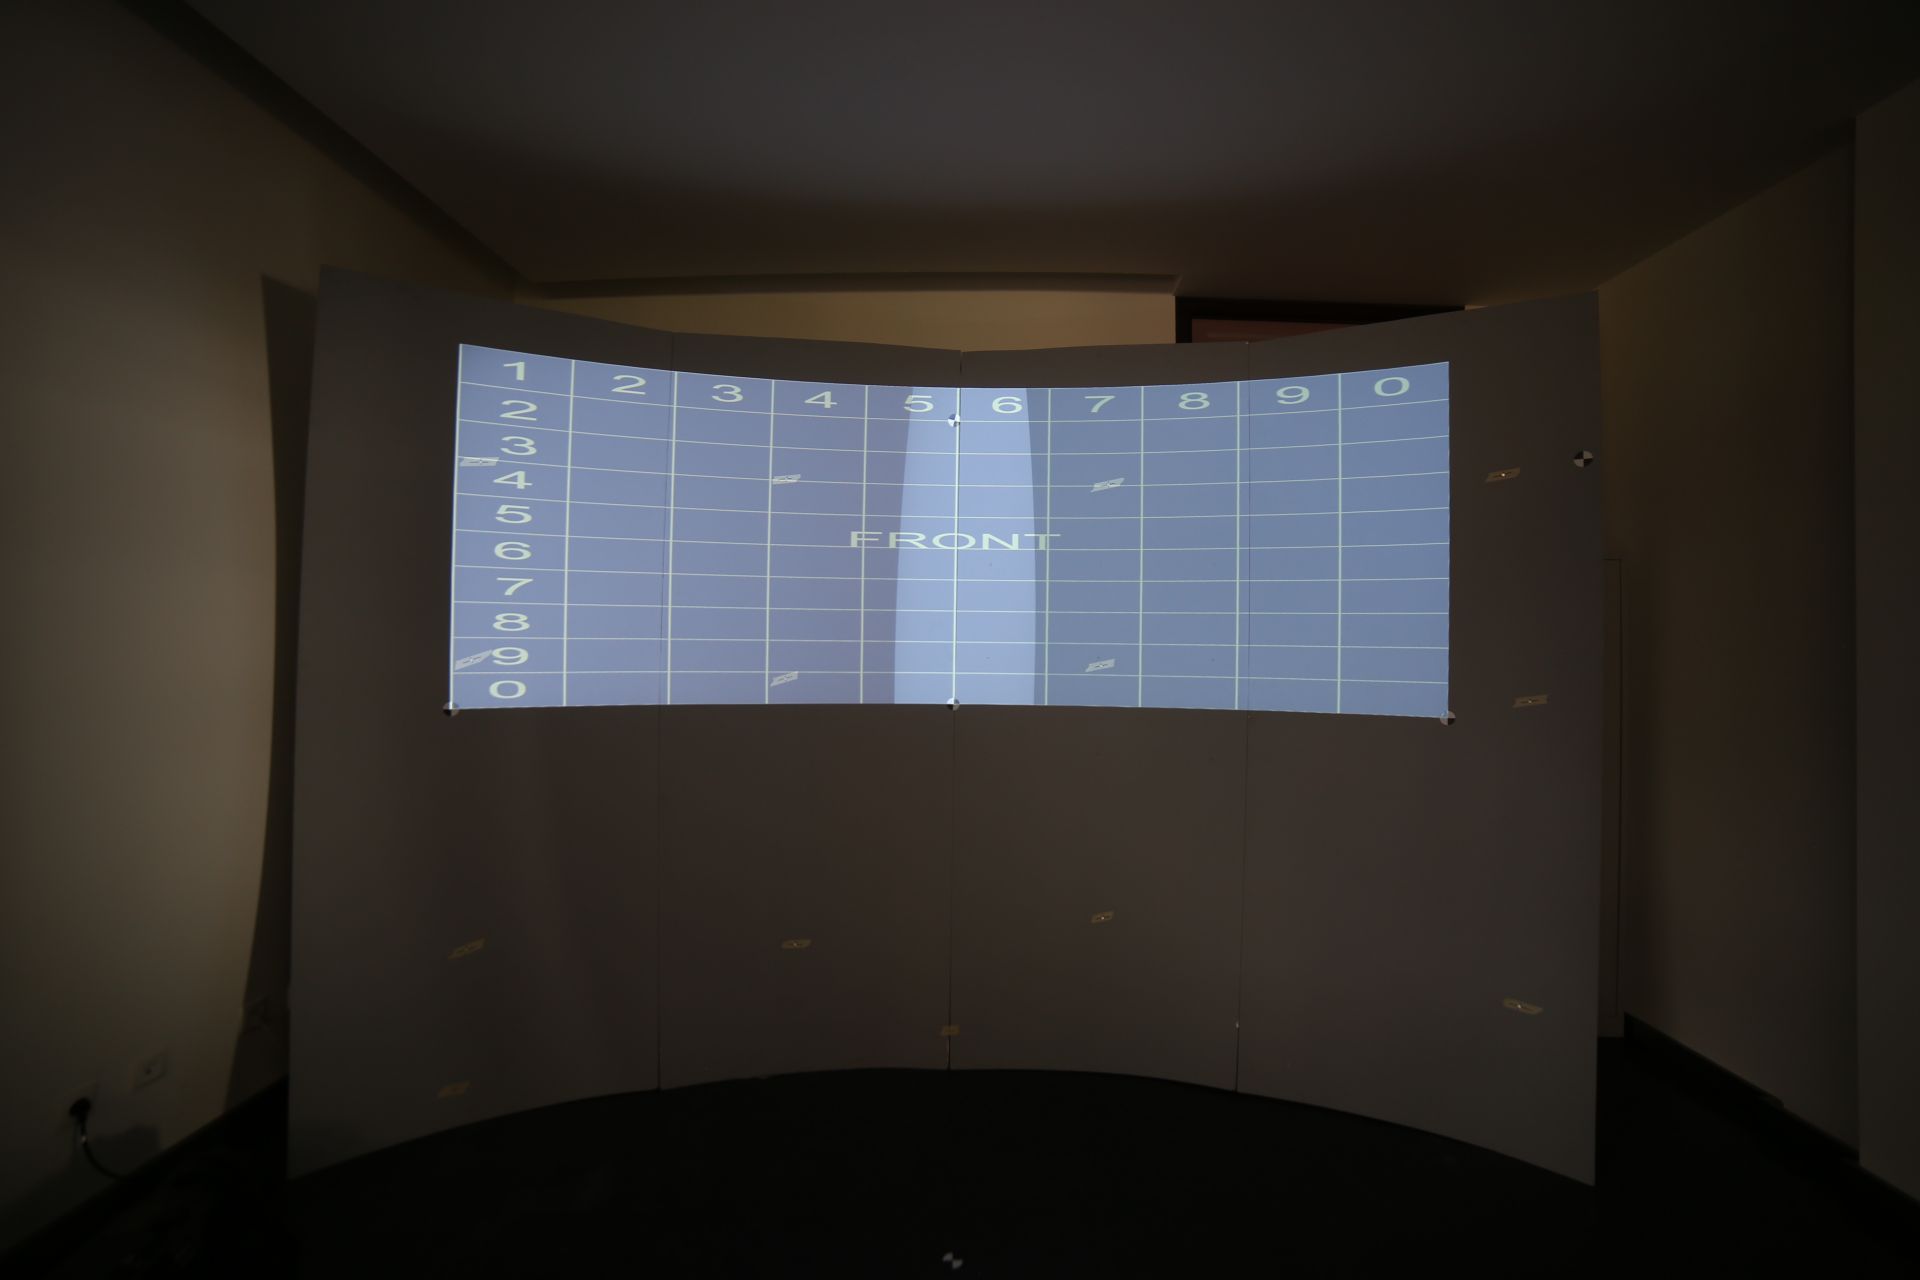
Warping assinged to corresponding outputs |
|
|
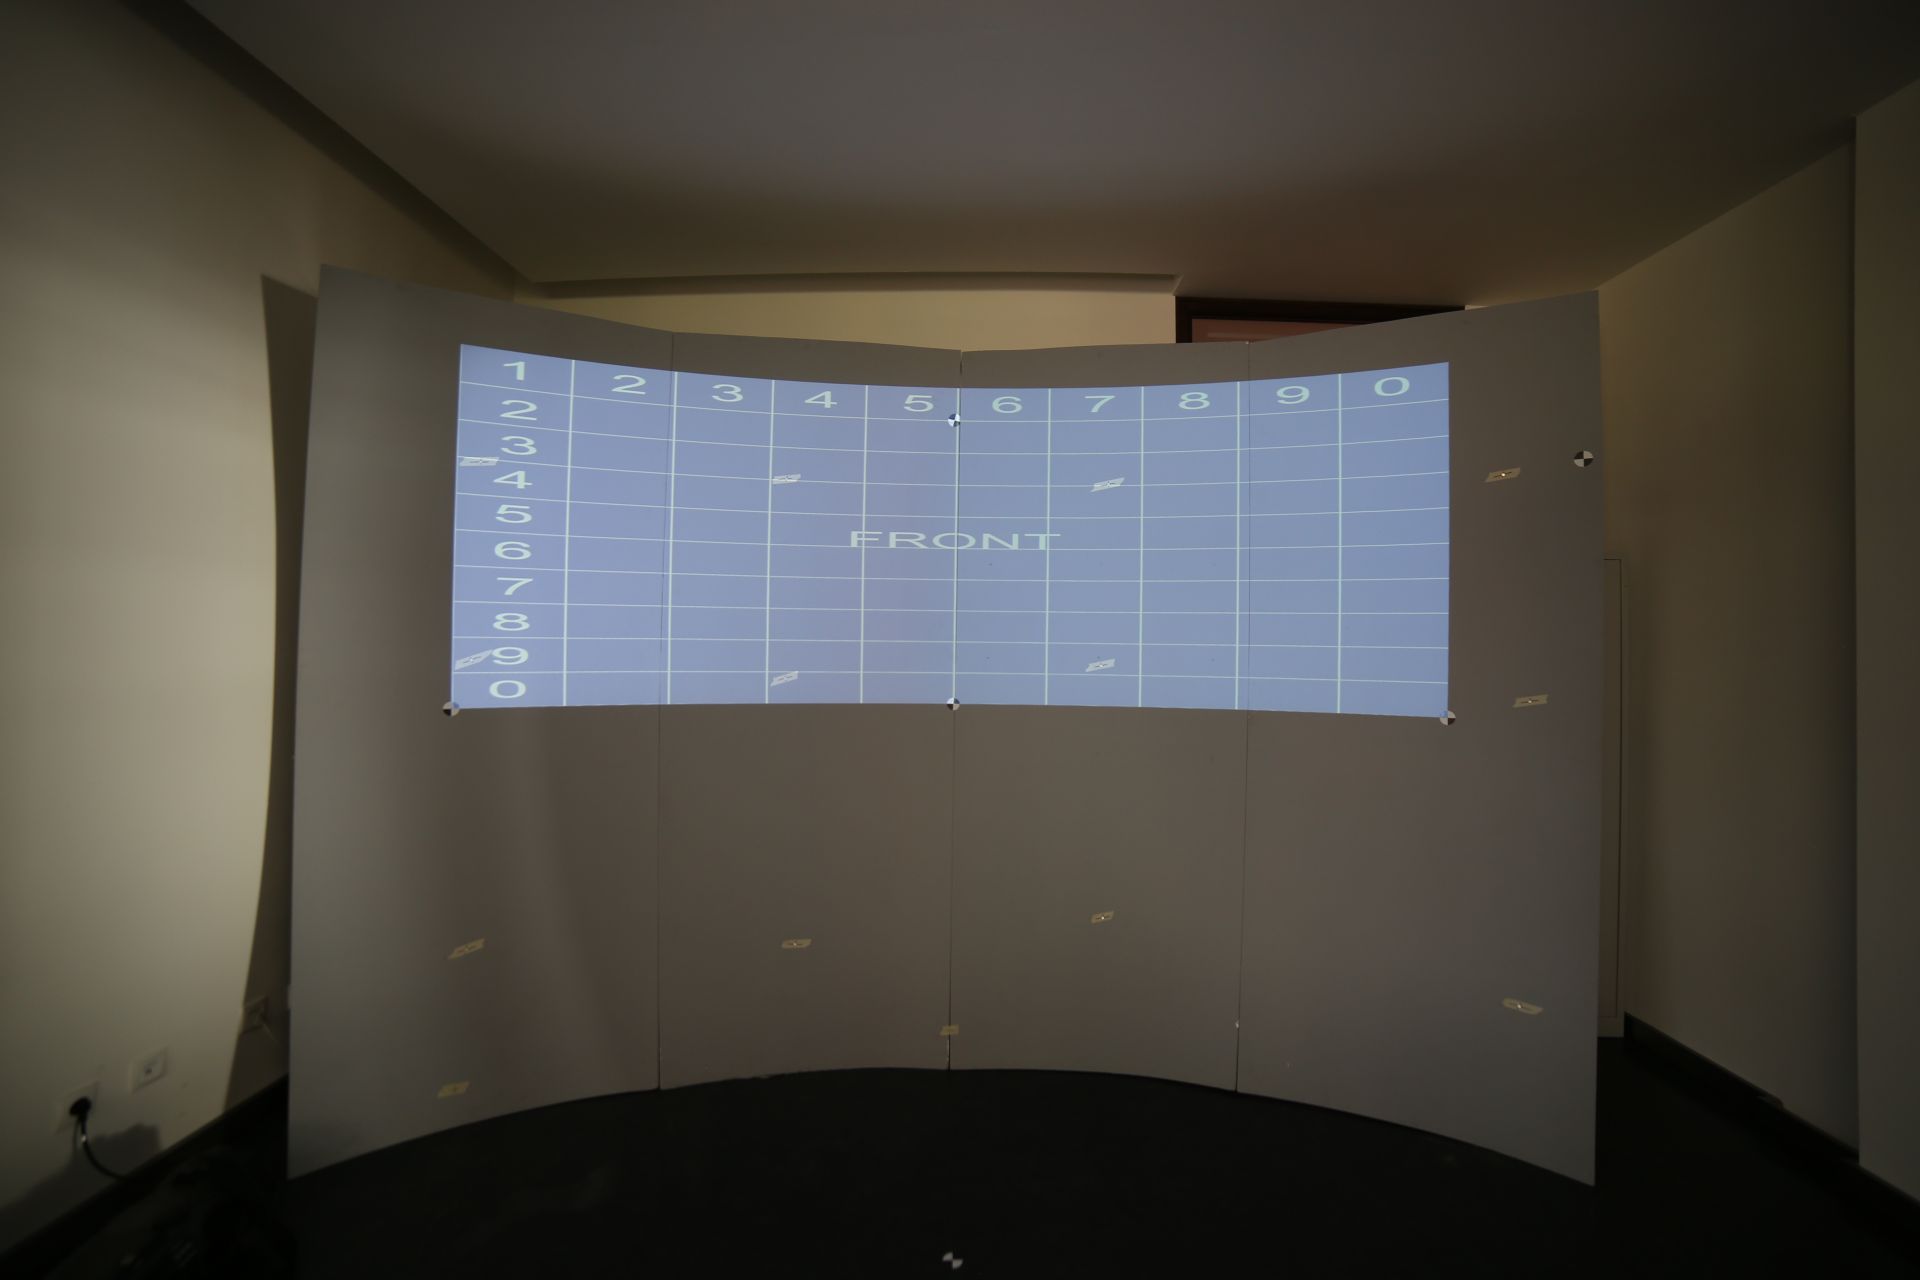
Blending put on layers and assigned to correct cameras |
|
|